AirFitTM N30 for AirMini

  • Minimalist design featuring an adjustable QuickFit™ elastic headgear with split-strap.
  • Curved cushion cradles under-the-nose for a comfortable fit1 and is designed to prevent nostril soreness.
  • HumidX™ waterless humidification is designed to provide comfort and convenience.
  • Designed exclusively for AirMini and to work with ActiveAir™ venting.

N30-for-airmini

Our lightest mask recreated just for AirMini

We've designed AirFit N30 for AirMini to be as light as our original AirFit N30 and to have all its best features. The addition of AirMini exclusive technologies, such as HumidX waterless humidification and ActiveAir venting, means you can better enjoy the benefits of therapy at home or while you're away.

Easy setup

Thoughtfully designed, AirFit N30 for AirMini allows you to accurately size and fit your patients. Three cushion sizes are included for convenience while its adjustable QuickFit elastic headgear with split-strap is easy to adjust and designed to provide a stable fit.

Support

Supporting you
Supporting your patients
Swipe

Sizing Cushion

  1. Familiarise yourself with the cushion-sizing template provided and the cushion sizes available.
  2. Hold the sizing template under your patient's nose, and use it to help determine the most suitable cushion size. The patient's nose should sit within the colour margins of the chosen size. 
  3. Select the matching cushion and try it on your patient for comfort and fit.

* If your patient is in between sizes, we recommend choosing the one with the most suitable width.

Fitting and adjustment

  1. Bring the mask up towards your patient's face so that the left and right indicators are correctly aligned with their nose. Once aligned, hold the cushion under their nose. 
  2. Hold the bottom strap of the split band, and pull the headgear over the back of your patient's head. The top band should sit comfortably on the crown of your patient's head.
  3. You can readjust the cushion by pulling it away from your patient's nose and letting it reseal itself.
  4. Adjust the split bands as needed to achieve a comfortable fit. To loosen, spread them apart, and to tighten, bring them together.
  5. To correct mask leak, try adjusting the length of the headgear through the buckle.
  6. Once the mask is secure and comfortable, you can connect the mask tubing and device tubing together.


Daily Cleaning

  1. Follow the mask disassembly instructions to disconnect the mask cushion and vent module. The HumidX cannot be washed. Set aside the HumidX in a clean, dry location.
  2. Soak each part in warm water (~30oC) and a mild liquid detergent.
  3. Hand wash the cushion inside and out, and the vent module with a soft bristle brush. Pay particular attention to the vent holes.
  4. Rinse the components well under running tap water. Shake to remove excess water and allow to air dry away from direct sunlight.

Weekly Cleaning

  1. Follow the mask disassembly instructions to disconnect the mask headgear and frame.
  2. Soak the headgear and frame in warm water (~30oC) and a mild liquid detergent.
  3. Hand wash the headgear and frame. When cleaning the frame, you scrub it using a soft bristle brush. Remember to pay attention to cleaning its vent holes.
  4. Rinse each of the components under running tap water.
  5. Shake off excess water off the frame, and leave each of the cleaned components to air dry away from direct sunlight.

Managing leak

If air escapes the mask cushion from any area other than the vent, try the following steps to stop the leak.

  1. If the cushion is not sitting correctly, try pulling it away from your patient's nose and letting it reseal itself.
  2. Adjust the mask tension as needed to achieve a secure seal by changing the length of the headgear through the buckle.

Disassembly

  1. Disconnect the mask tubing from the vent module by gently twisting it and pulling apart. If your patient is using the HumidX or HumidX Plus, remove it from the vent module.
  2. Disconnect the vent module from the AirMini tubing by gently twisting it and pulling apart.
  3. Firmly pinch one side of the cushion and pull away from the frame.
  4. Unhook the headgear from the stabiliser by pulling on the end cap to reveal the buttonhole.
  5. Slide the headgear off the end of the stabiliser.

Assembly

  1. With the grey side of the headgear facing out, insert each end of the headgear band over the stabilisers through the buttonholes.
  2. Secure the headgear by pulling the buttonholes over the ends of the stabilisers.
  3. Holding the mask frame, stretch the headgear lightly to ensure it is securely attached. Ensure that the headgear band is not twisted.
  4. Align the notch in the cushion to the tab on the mask frame. Firmly push one side of the cushion onto the frame, then repeat on the other side. Push down all the edges of the cushion onto the frame to ensure that the edges are completely flat.
  5. Connect the AirMini tubing to the vent module by pushing the ends together and twisting until it locks in place.
  6. To add optional humidification, insert the HumidX or HumidX Plus into the vent module. Connect the mask tubing to the vent module by pushing the ends together and twisting until it locks in place.

Mask Inspection

Regular inspection of the mask is essential to ensure it is working correctly. If any damage is found, replace the mask component.

  1. Examine the mask system and become familiar with its component.
  2. Follow the user guide instructions to disassemble the mask.
  3. Examine the headgear for signs of wear, tear and damage.
  4. Examine the frame for signs of wear, tear and damage.
  5. Examine the cushion for signs of wear, tear and damage.
  6. Check daily the HumidX or HumidX Plus, if used, for any signs of damage or blockages caused by dirt or dust.

Notes:

  • HumidX/HumidX Plus cannot be washed.
  • When HumidX/HumidX Plus is not being used, store it in a clean, dry location.
  • HumidX/HumidX Plus must be replaced 30 days after opening.

Helpful resources

For additional therapy assistance.


Documents

Getting started with therapy

Here are some links to help your patients get on the right track with the sleep therapy..
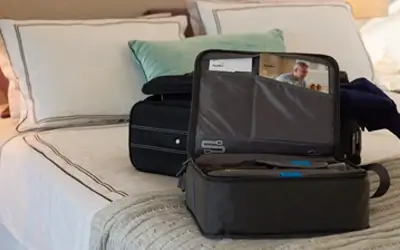
travellingwithyourequipment

Access extra service and support by registering your ResMed product.

Learn more
resmedmyair_b2c

For further support, our free myAir program offers ongoing care and guidance via personalised therapy tips, coaching and advice.

Learn more
registeryourproduct

If you have any questions regarding warranty information on our masks, please contact our local customer service team.

Learn more

An ecosystem of solutions for individual answers

From diagnostics and healthcare informatics to therapy devices and masks, our solution can help you get a better night's rest. Crafted to offer both confidence and flexibility, our products allow for a high-quality therapy experience catered to your needs.

Our device, mask and accessory ranges, together with our online support program myAir™, enable you to easily customise your therapy experience to your preferences.

References

1

* As of October, 2019. Based on available user guide data. The total weight of AirFit N30, which includes the headgear and excludes the packaging, is 45g.
 

2

ResMed guided external clinical study of 17 evaluable CPAP mask users from 12-25 February, 2019 in Sydney, AU who trialed ResMed AirFit N30 at home for 7 nights in place of their prescribed mask, ResMed AirFit P10. CPAP users rated subjective criteria for AirFit N30 and AirFit P10 on a Likert Scale of 0-10.

3

Statistically significant differences (p >0.05) in median scores were found between the two masks, AirFit N30 and AirFit P10.

4

The myAir™ for Air10™ by ResMed app is available for AirSenseTM 10 and AirCurve 10 devices with build-in wireless connectivity only. Wireless communication depends on network availability.